Pro Displays: How to adjust Color Uniformity
Using the Color Uniformity function will allow you to adjust the color tone over the whole screen. This is an important function which can also help fine tune color calibration on a single or multiple screen setup.
This function can also be used if the 'Color Calibration' adjustment is not available.
|
The color tone may not be uniform even after performing color uniformity. |
- Press the [Menu] button while projecting.
- Select Display from Extended.
-
Select Color Uniformity, and then press the [Enter] button.
The following screen is displayed.
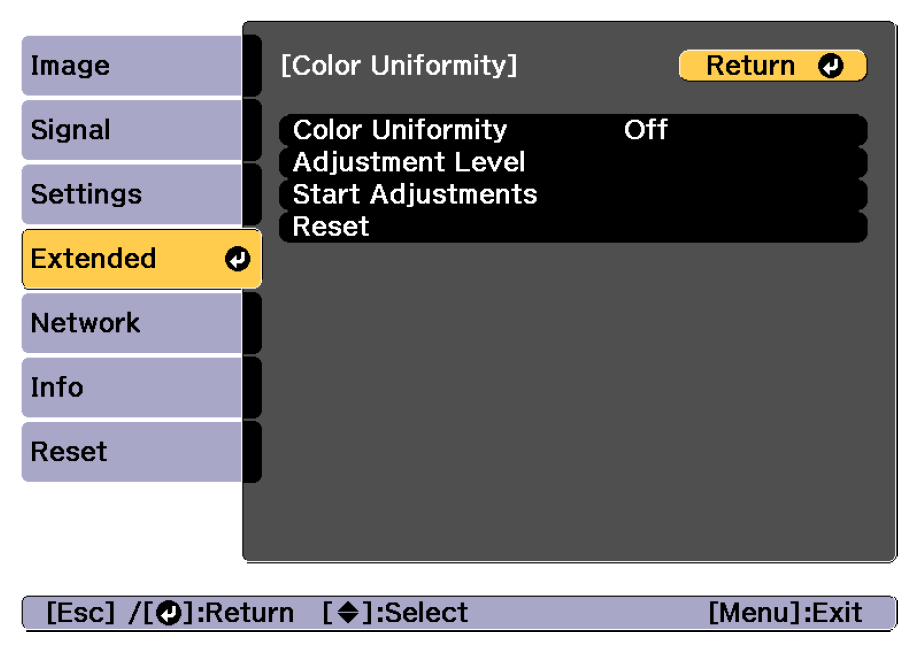
Color Uniformity: Turns color uniformity on or off.
Adjustment Level: There are eight levels from white, through gray, and up to black. You can adjust each level individually.
-
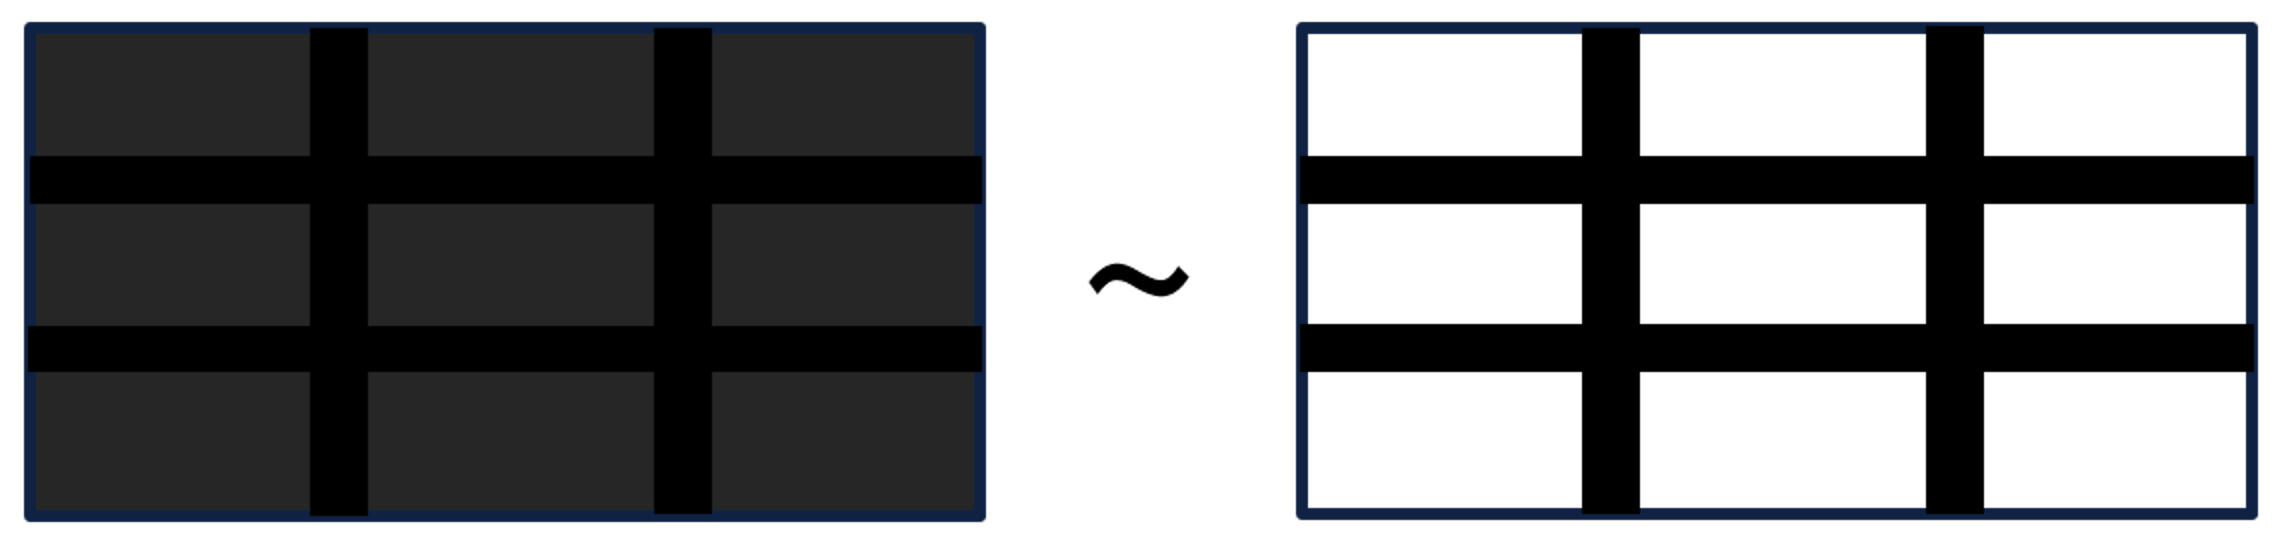
Level 1 for Black:
The default setting value is 0 for each RGB. In this level you can only increase each RGB.
-
Level 8 for White:
The default setting value is MAX for each RGB. In this level you can only reduce each RGB.
-
Levels 2 - 7:
This is for more intermediate tones, you can increase or reduce any RGB value in these tones
Start Adjustments: Starts adjusting color uniformity.
Reset: Resets all adjustments and settings for Color Uniformity to their default values.
 Note:
Note:The image may become distorted while adjusting Color Uniformity. The image is restored once adjustments are complete.
-
Level 1 for Black:
- Select Color Uniformity, and then press the [Enter] button.
-
Set to On, and then press the [Esc] button.
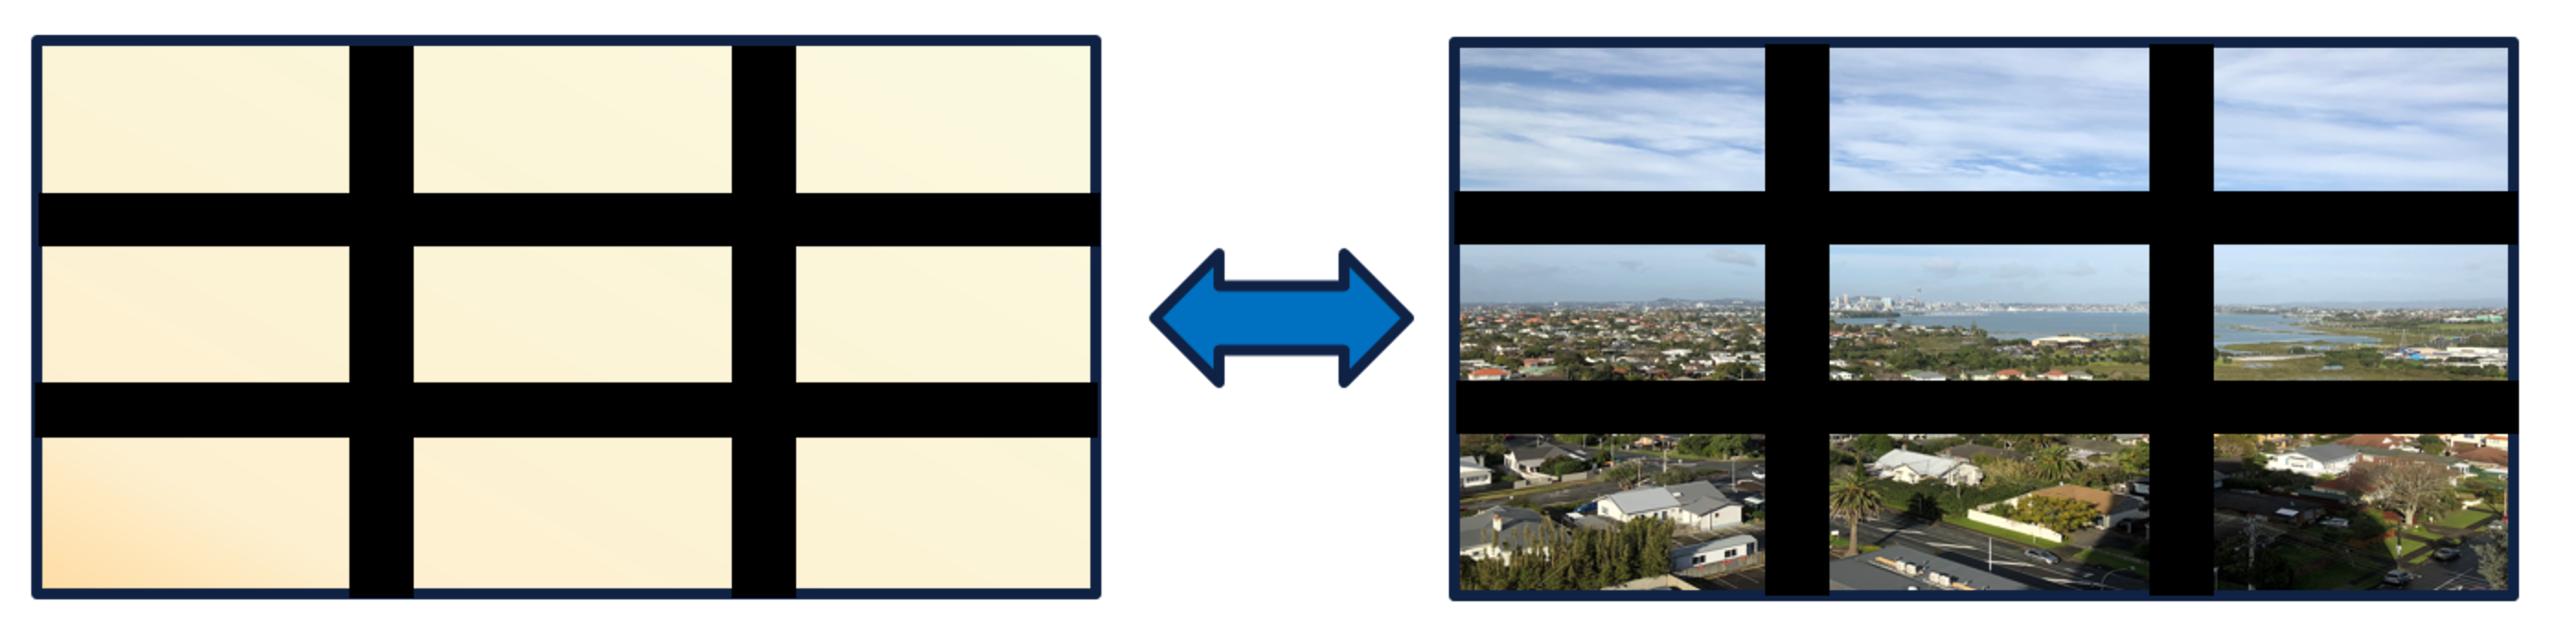
When Color Uniformity is set to On, the following black grid is displayed. You can switch the background image by pressing the Enter button.
- Select Adjustment Level, and then press the [Enter] button.
-
Use the [Left]/[Right] arrow buttons to set the adjustment level.
 Tip:
Tip:It is recommended to start adjustments at Level 8 - Black and work down to Level 2. Continue to adjust or move to the next level even if there is no adjustment required. When adjusting, display a black display pattern. Do not use AV/Mute.
- Press the [Esc] button to return to the previous screen.
- Select Start Adjustments, and then press the [Enter] button.
-
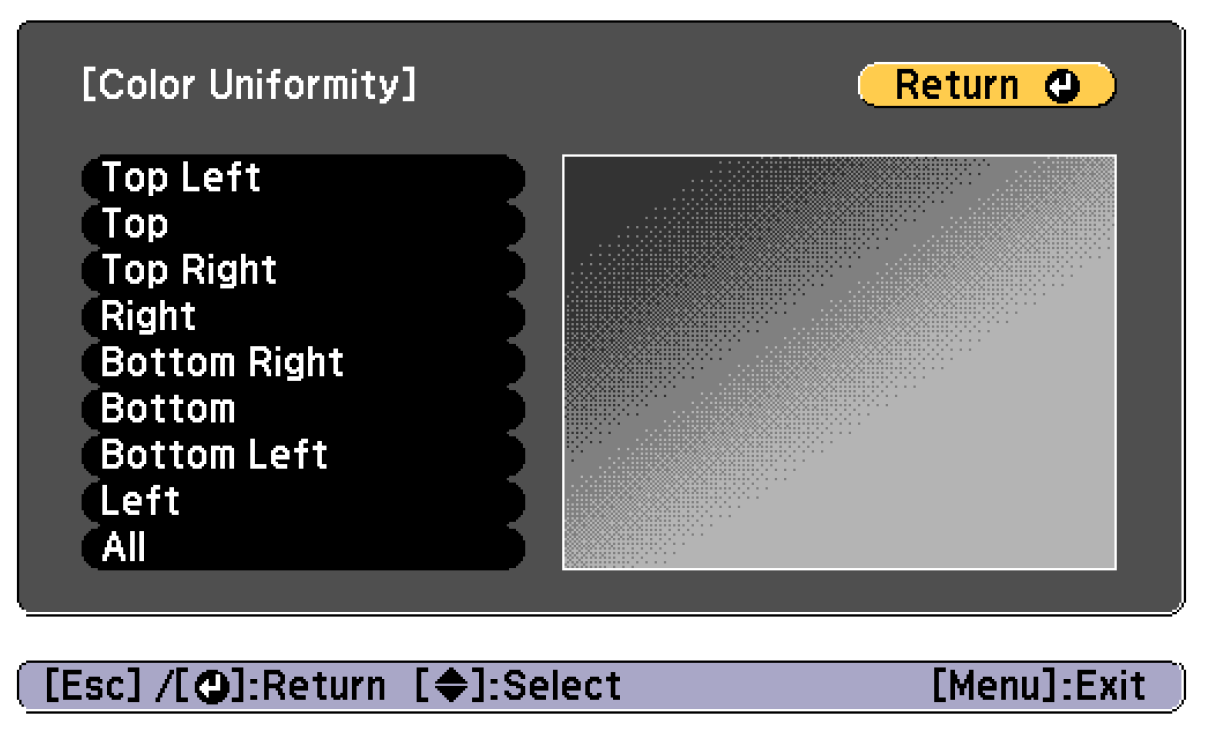
Select the area you want to adjust, and then press the [Enter] button.
Adjust the outer areas first, and then adjust the whole screen.
-
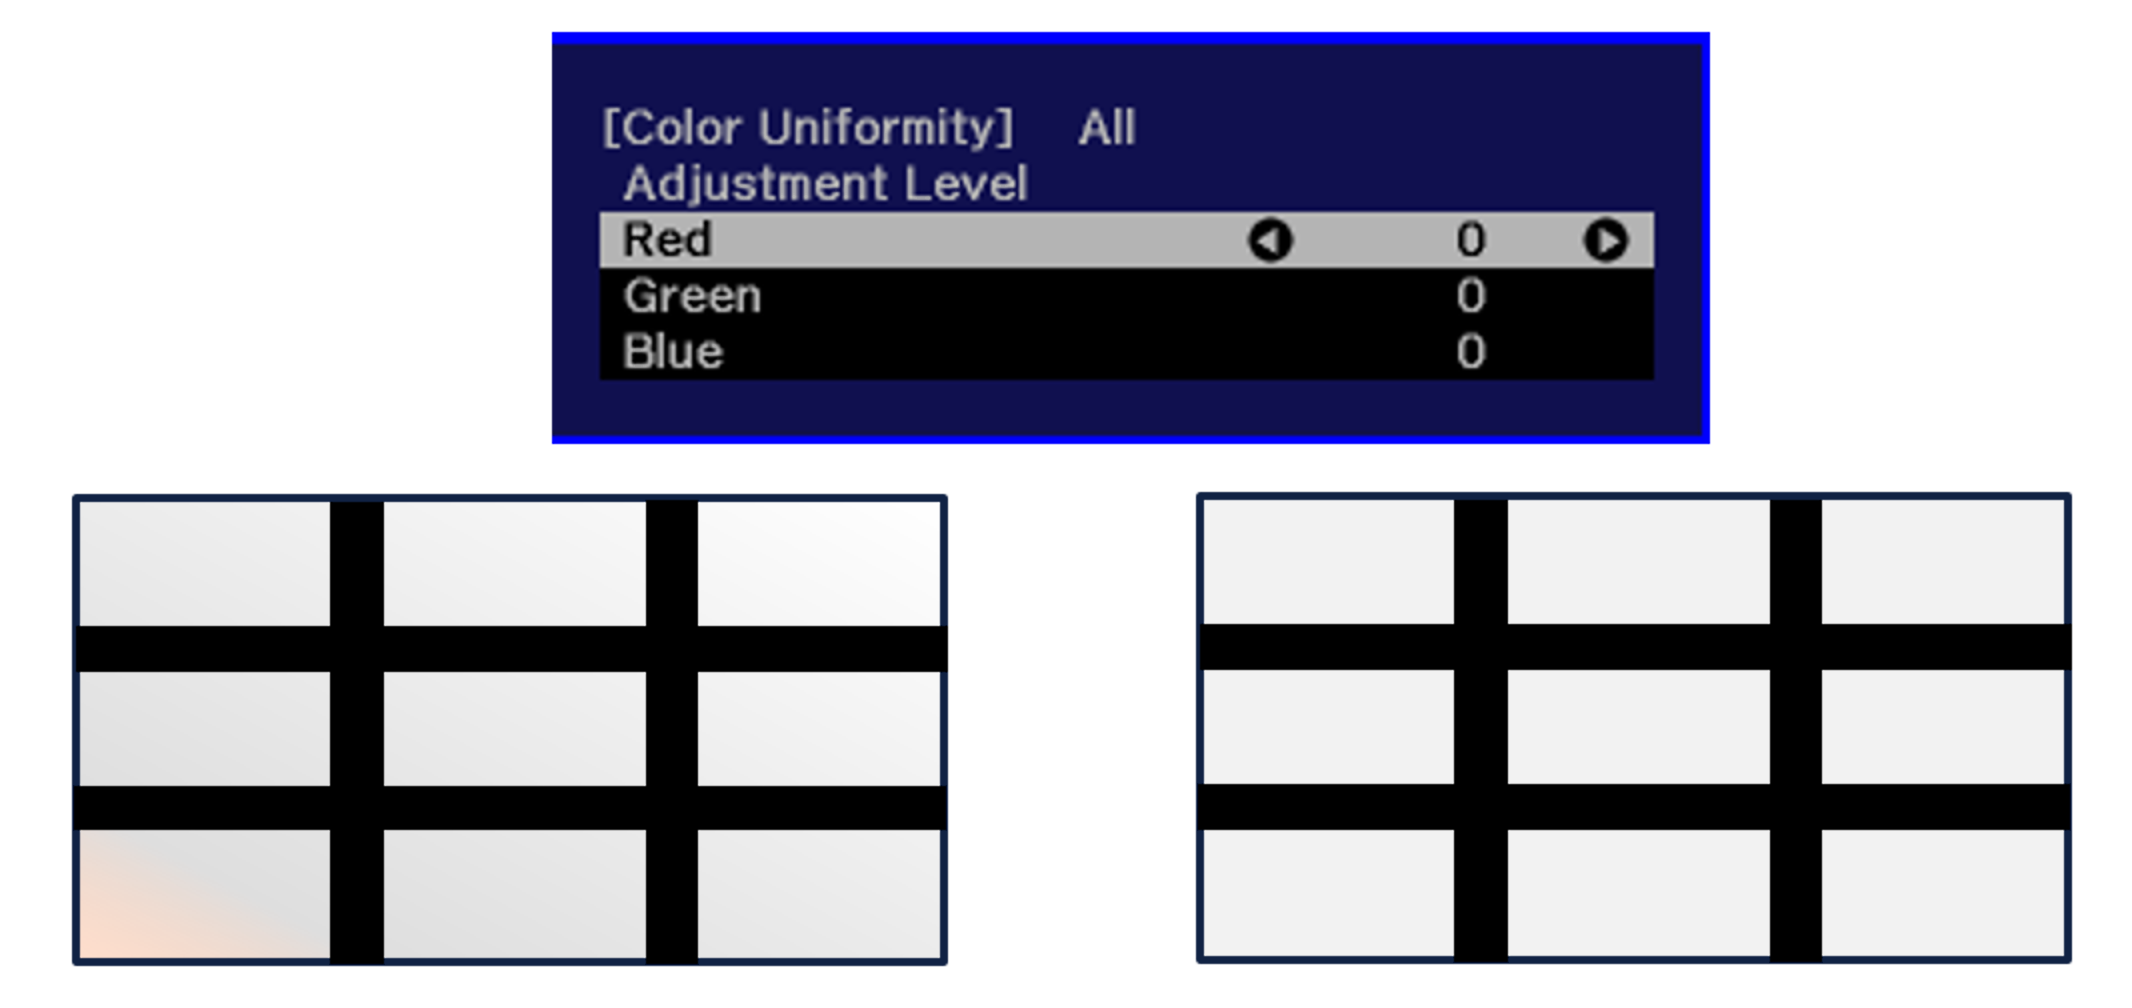
Use the [Up]/[Down] arrow buttons to select the color you want to adjust, and then use the [Left]/[Right] arrow buttons to adjust.
Press the [Left] arrow button to weaken the color tone. Press the [Right] arrow button to strengthen the color tone.

- Return to step 6 and adjust each level.
- To complete the adjustment, press the [Menu] button.
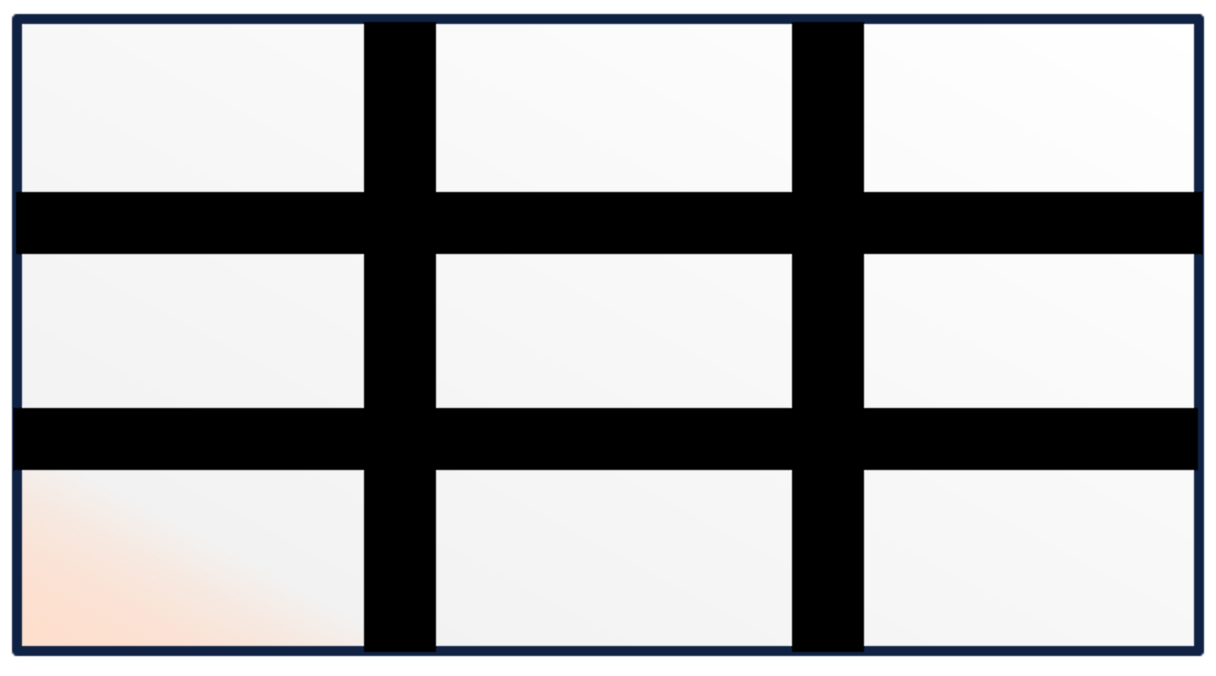
Example: Adjusting Color Uniformity
Please see the example below to understand how to adjust an individual level, in this example the color adjustment is in level 7.
This image shows red tint in the bottom left-hand corner:
-
Start by selecting the area that requires adjustment, in this case Bottom Left.
 Note:
Note:By selecting All, you can adjust the whole screen. You cannot select or adjust the centre square of the image.
-
Reduce the red level or increase the Green and Blue to counter the red hue.